Dragon Slayer 4(Legacy of the Wizard) Status(monster character)
ドラゴンスレイヤー4 ドラスレファミリー ステータス解説(モンスターキャラクター)TOC / 目次
The order of each status is the order in which they are listed in ROM, and the names are given for convenience.各ステータスの順序はROM内の格納順、名称は便宜上付けたものです。
-
COMMON /
全キャラ共通
-
JUMP /
ジャンプ力
-
JUMP /
ジャンプ力
-
INDIVIDUAL /
モンスターごと
-
GRAHPIC /
グラフィック
-
TRANSPARENCY FLAG /
透過フラグ
-
PALLETE /
色パレット
-
COORDINATE /
出現座標
-
LIFE /
ライフ
-
STRENGTH /
攻撃力
-
DEADCHAR /
死亡時グラフィック
-
ANIMATION NUMBER /
アニメーション枚数
-
MOVE PATTERN /
行動パターン
-
SPEED /
速度
-
GRAHPIC /
グラフィック
-
MONSTER DATA /
モンスターデータ
COMMON / 全キャラ共通
JUMP / ジャンプ力
The same value is set in all versions.全機種で同じ値が設定されている。
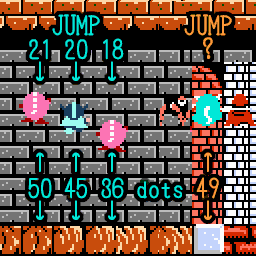
JUMP power and height
モンスターのジャンプ力。全キャラ共通で値は15固定。
Note
The height a monster can jump can be calculated by the following formula.((JUMP power-1)^2)/4 dots (Round down to decimal point)
モンスターがジャンプできる高さは以下の計算式で求めることができる。
((ジャンプ力-1)^2)/4 ドット (小数点以下切り捨て)
The formula for determining the height from the player's jumping power is different.
プレイヤーのジャンプ力から高さを求める式は異なる。
The player moves by 1 frame (affected by gravity),
whereas the monster moves by 3 frames (affected by gravity).
There are 9 monsters in the area, divided into 3 groups of 3 monsters each, and each group moves in turn.
Therefore, the monsters are less affected by gravity than the players, and their movements are generally fluffy while they are in the air.
プレイヤーが1フレームごとに動く(重力の影響を受ける)のに対して、
モンスターは3フレームごとに動く(重力の影響を受ける)。
モンスターはエリア内で9体存在し、3体ずつ3グループに分けられ1グループずつ順番に行動する。
そのためモンスターはプレイヤーに比べて受ける重力の影響が少なく、空中にいる間は全体的にフワフワした動きになる。
INDIVIDUAL / モンスターごと
Monster data is stored 9 monsters by 1 area.The below is the order in which monster data is stored in ROM.
モンスターのデータは1エリアごとに9体ずつ格納されている。
以下、項目の説明はモンスターデータのROM内の格納順。
GRAHPIC / グラフィック
1 byte. The value range of FC/NES version is 0x41 to 0x75.Specify the graphics of the monster to be used.
1 byte。FC/NES版での値の範囲は0x41から0x75。
使用するモンスターのグラフィックを指定する。
Most monsters have 4 graphics, and the 1st one is specified here.
The basic structure is: 1st and 2nd are for walking, 3rd is for jumping, and 4th is for being knocked down.
殆どのモンスターはグラフィックが4枚であり、ここでは1枚目が指定される。
基本的な構成は1, 2枚目が歩行、3枚目がジャンプ、4枚目が倒された時。
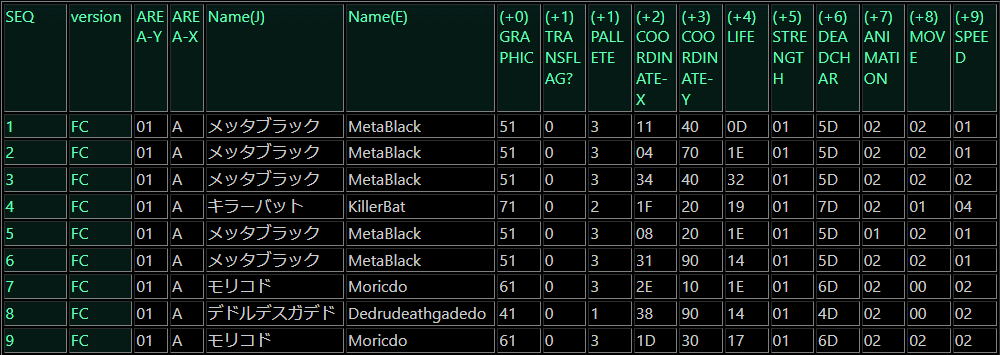
FC/NES Meta Black

51

55

59

5D

41

45

49

4D
Availability of left-right reversal depends on the version. See the following page.
左右反転の有無は機種による。このページを参照のこと。
BUILD OF DRAGON SLAYER 4 / ドラゴンスレイヤー4を作った人たち
The graphics not used in any area are as below.
どのエリアでもグラフィックが使われていないモンスターは以下の4体。
TRANSPARENCY FLAG / 透過フラグ
4 bit. The value range of FC/NES version is 0(OFF) or 2(ON).Specify the transparency flag of the monster to be used.
4 bit。FC/NES版での値の範囲は0(OFF)か2(ON)。
使用するモンスターの透過フラグを指定する。
NES Aryu transparemcy on
NES Aryu transparemcy off
If the monster damages the player even once, this flag is turned OFF.
Pochi, who does not take damage from the monster, can never defeat a monster with this flag ON.
Mimics and elementals ambush the player not because of this flag, but because of the MOVE PATTERN described below.
このフラグがONの時、モンスターの身体が背景の後ろに隠れる。この時モンスターはプレイヤーからダメージを受けない。
モンスターがプレイヤーに一度でもダメージを与えるとこのフラグはOFFになる。
モンスターからダメージを受けないポチはこのフラグがONのモンスターを絶対に倒すことができない。
ミミックやエレメンタルが待ち伏せをするのはこのフラグではなく後述する行動パターンによるもの。
PALLETE / 色パレット
4 bit. The value range of FC/NES version is 0 to 3.Specify the color pallete of the monster to be used.
4 bit。FC/NES版での値の範囲は0から3。
使用するモンスターの色パレットを指定する。
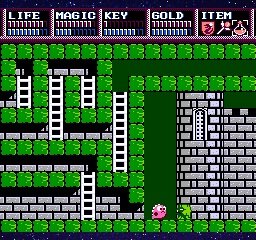
COORDINATE / 出現座標
2 byte. Specify the location of the monster's appearance.2 byte。モンスターの出現位置を指定する。
X-coordinate is specified in 1 byte, in units of cells. (The position is the specified value multiplied by 16 dots.)
The value range is 0x00 to 0x3F.
Y-coordinate is specified in dots by 1 byte.
The value range is 0x00 to 0xB0.
X座標が1 byteでマス単位の指定。(指定した値に16ドットを掛けた位置になる)
値の範囲は0x00から0x3F。
Y座標が1 byteでドット単位の指定。
値の範囲は0x00から0xB0。
As an exception, when (X, Y) is (0, 0), the position of appearance is random.
例外として、(X, Y) が (0, 0)の場合は出現位置がランダムになる。
If there is a wall at the location where the monster appears, it will not generate their egg and will not be able to appear.
If you remove the wall at that location, the monster will start to appear.
出現位置に壁がある場合、そのモンスターは卵が生成されず出てくることが出来ない。
その場所の壁を除去すると出てくるようになる。
FC 壁に埋まったモンスター
FC 壁に埋まったモンスター
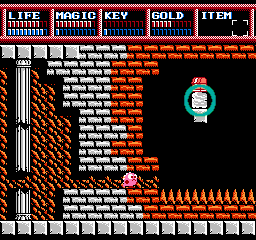
FC 壁に埋まったモンスター
FC 壁に埋まったモンスター
LIFE / ライフ
The same value is set in all versions.全機種で同じ値が設定されている。
2 byte. The value range is 1 to 255.
It is the life force of the monster. When this reaches 0, the monster has been defeated.
Damage to the monster is determined by the time the player's bullets overlap with the monster's, so a single bullet can do a lot of damage.
2 byte。値の範囲は1から255。
モンスターの生命力。これが0になると倒したことになる。
モンスターへのダメージはプレイヤーの弾とモンスターが重なった時間で決まるため、1つの弾で大きなダメージが出ることもある。
Highest LIFE Ranking / LIFE 高い順ランキング

MSX1
Rockgaea: 255
ロックガイア: 255
Values are the same in all versions.
The gauge is counter-stopped in all other MSX1 versions, but in the MSX1 version, the value is displayed.
数値は全機種共通。
MSX1版以外ではゲージがカウンターストップしているが、MSX1版では数値が表示される。
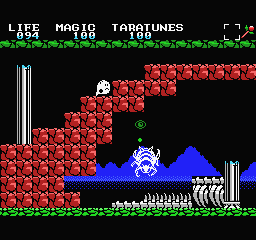
NES
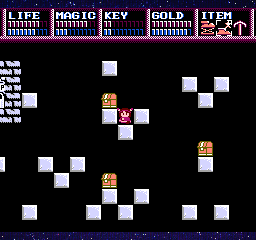
Mimic: 255
ミミック: 255
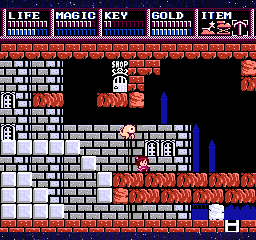
The LIFE value varies depending on the area. Mimic in this room, Lyll area has a LIFE of 255.
エリアによってLIFEの値が異なる。リルル面のこの部屋のミミックはLIFEが255もある。

MSX1
Archwinger: 200
アークウィンガー: 200
NES
Mimic: 200
ミミック: 200
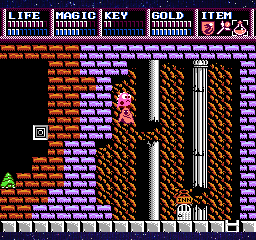
Mimic in Xemn area.
ゼムン面のミミック。

MSX1
Erebone: 150
エレボーン: 150
MSX1
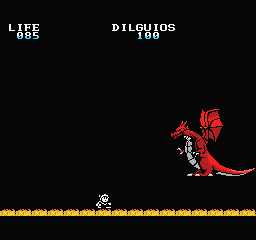
Keela: 100
ディルギオス: 100
Although the LIFE value is 4th, but only Keela has a higher endurance because of the different formula for taking damage from the player.
Keela has the highest durability in fact. Because it takes 100 Royas attacks in the MSX1 version and 50 in the MSX2, FC, NES, MOBILE PHONE versions before he falls.
LIFEの数値だけを見ると第4位であるが、ディルギオスだけはプレイヤーからダメージを受ける計算式が違うため耐久力は事実上最も高い。
ディルギオスが倒れるまでにロイアスの攻撃がMSX1版では100発、MSX2、FC、NES、携帯電話版では50発必要となる。
MSX1
Taratuness: 100
タラチュネス: 100
NES
Mimic: 100
ミミック: 100
Mimic in Pochi area.
ポチ面のミミック。
NES
Gers: 100
ゲルス: 100
Gers in Pochi area. However, there are also some monsters whose LIFE is meaningless because they are defeated when they touch the player depending on their MOVE PATTERN.
ポチ面のゲルス。ただし行動パターンによってプレイヤーと接触すると倒れるためLIFEに意味がない個体も混ざっている。
Lowest LIFE Ranking / LIFE 低い順ランキング

NES
Cyclops: 1
サイクロプス: 1
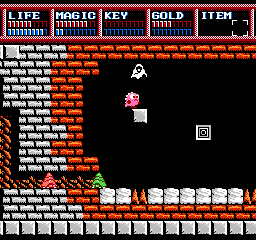
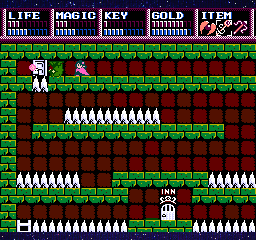
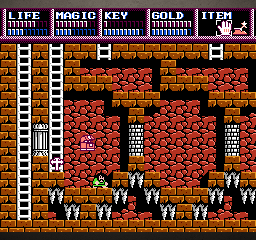
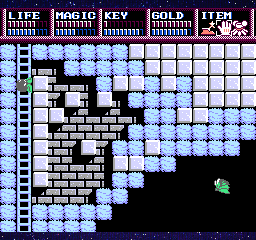
Cyclops inside the wall of Keela's room.
ディルギオスの部屋の壁の中にいるサイクロプス。
NES
Mayu: 8
マユ: 8
Blue Mayu in Lyll area.
リルル面の青いマユ。
STRENGTH / 攻撃力
The same value is set in all versions.全機種で同じ値が設定されている。
2 byte. The value range is 0 to 50.
It is the strength of the monster. Apart from this value, there is another condition that doubles the attack power of the monster.
2 byte。値の範囲は0から50。
モンスターの攻撃力。この値とは別にモンスターの攻撃力が2倍になる条件がある。
Players take damage when they come in contact with monsters.
A timer that resets the contact judgment between the player and the monster is running at 60 frame cycles from the start of the game.
This is why player may or may not receive damage twice back-to-back.
プレイヤーはモンスターと接触するとダメージを受ける。
プレイヤーとモンスターの接触判定をリセットするタイマーがゲーム開始時から60フレーム周期で動いている。
2回連続でダメージを受けることがあったりなかったりするのはこのため。
If the player continues to contact the monster,
the timing of damage will be either from 1 to 60 frames between the 1st and 2nd contact,
always 60 frames between the 2nd and 3rd contact, and fixed at 60 frames thereafter.
プレイヤーがモンスターに接触し続けた場合にダメージを受けるタイミングは、
1回目と2回目の間は1フレームから60フレームのいずれか、
2回目と3回目の間は必ず60フレーム、以後60フレーム固定となる。
STRENGTH Highest Ranking / STRENGTH 高い順ランキング
NES
Mimic: 50
ミミック: 50
Mimic in Pochi area. The area effect doubles, That attack will be 100 damage.
ポチ面のミミック。エリア効果で2倍となり、一撃で100ものダメージをたたき出す。
MSX1
Rockgaea: 40
ロックガイア: 40
MSX1
Archwinger: 30
アークウィンガー: 30

NES
Mimic: 30
ミミック: 30
Mimic in common area 1-D. The room is in the early stages of the project, but it takes a lot of damage.
共通面1-Dのミミック。序盤の部屋なのに大ダメージを受ける。
NES
Gers: 25
ゲルス: 25
Gers in Pochi area.
ポチ面のゲルス。
NES
Mu: 20
ムウ: 20
Mu in last of Maia area.
メイア面終盤のムウ。
STRENGTH Lowest Ranking / STRENGTH 低い順ランキング
NES
Cyclops: 0
サイクロプス: 0
Cyclops inside the wall of Keela's room. In fact, it is not damaged by contact.
ディルギオスの部屋の壁の中にいるサイクロプス。実は接触してもダメージを受けない。
NES
Egg-Man: 0
エッグマン: 0
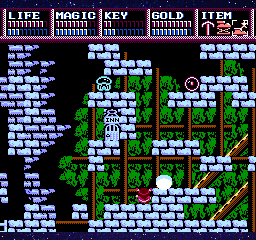
Egg-Man in common area 1-D. Contact with this monster will only make a sound but will not cause damage.
共通面1-Dのエッグマン。接触しても音が鳴るだけでダメージはない。

NES
Mayu: 0
マユ: 0
Red and blue Mayu in Lyll area.
リルル面の赤と青のマユ。

NES
Roman: 0
ローマン: 0
Roman in Xemn area.
ゼムン面のローマン。
There are many monsters with STRENGTH is 1. Therefore, the ranking is omitted.
STRENGTHが1のモンスターは多数いるため割愛。
DEADCHAR / 死亡時グラフィック
1 byte. The value range of FC/NES version is 0x41 to 0x75.Specify the graphic to be used when the monster is defeated.
1 byte。FC/NES版での値の範囲は0x49から0x7D。
モンスターが倒された時に使用するグラフィックを指定する。
Most monsters have 4 graphics, The 4th piece (4D, 5D, 6D, 7D in the FC/NES version) is designated.
殆どのモンスターはグラフィックが4枚であり、4枚目(FC/NES版では4D, 5D, 6D, 7D)が指定される。
FC/NES Mayu

51

55

59

5D
However, there are exceptions, such as when Wlith and Elemental use the same graphic when they are defeated,
or when exceptions, such as Mu, where there are five graphics, will have values other than this.
しかし、レイスとエレメンタルが倒された時に同じグラフィックを使用したり、
グラフィックが5枚存在するムウなどの例外はこれ以外の値となる。
FC/NES Wlith

61

65

71
65

71

75

79

7D

49
As a further exception, Slimes have different graphics when they are defeated depending on the individual: 1st, 2nd, and 4th.
さらに例外として、スライムは個体によって倒された時のグラフィックが1枚目、2枚目、4枚目と異なる。
FC/NES Slime

71

75

79

7D
NES defeated slime

NES defeated slime
NES defeated slime
ANIMATION NUMBER / アニメーション枚数
The same value is set in all versions.全機種で同じ値が設定されている。
2 byte. The value range is 0 to 3.
Specify the number of animations when the monster moves.
The ANIMATION NUMBER does not include a DEADCHAR, but it is possible to specify the same graphic as the ANIMATION NUMBER from the DEADCHAR side.
2 byte。値の範囲は0から3。
モンスターの移動時のアニメーション枚数を指定する。
アニメーションパターンに死亡時グラフィックは含まれないが、死亡時グラフィック側からアニメーションパターンと同じグラフィックを指定することは可能。
00: 1 frame, No animation / 1枚・アニメーションなし
Only 1 pattern. Specify for non-animated monsters.1パターンのみ。アニメーションしないモンスターに対して指定する。
FC/NES Elemental

01: 2 pattern animation With walk and without jump / 2枚・歩きあり・ジャンプなし
Walking 2 Patterns. Specify for monsters that walk but do not jump.歩き2パターン。歩くがジャンプしないモンスターに対して指定する。
FC/NES Dorak


02: 3 pattern animation With walk and with jump / 3枚・歩きあり・ジャンプあり
2 walking patterns and 1 jumping pattern. The most orthodox type.The flying type also has a horizontal movement 2 patterns and a vertical movement 1 pattern.
歩き2パターンとジャンプ1パターン。最もオーソドックスなタイプ。
飛行タイプも横移動2パターンと縦移動1パターン。
FC/NES Lightball


03: 4 pattern animation and without jump / 4枚・ジャンプなし
4 patterns are used for animation. Very smooth movement.アニメーションに4パターンを使用するタイプ。非常になめらかな動きになる。
FC/NES Mu


MOVE PATTERN / 行動パターン
The same value is set in all versions.全機種で同じ値が設定されている。
2 byte. The value range is 0 to 8.
It is the move pattern of the monster.
2 byte。値の範囲は0から8。
モンスターの行動パターンを指定する。
00: Random walk and jump / ランダム歩行+ジャンプ
FC/NES Memes


ランダムな方向に歩き、ランダムなタイミングでジャンプする。一定時間ごとに歩く方向と速度が変わる。ハシゴを使う。
01: Random flight / ランダム飛行
FC/NES Killer Bat

Stops or changes direction when it comes in contact with a player.
ランダムな方向に直線状に飛行する。壁を通り抜ける。一定時間ごとに向きを変える。プレイヤーと接触すると止まるか向きを変える。
02: Shuttle walk / 往復歩行
FC/NES Slug


地面の上を左右にまっすぐ歩く。壁にぶつかるか足場がなくなると反転する。ハシゴは無視する。
03: Chase walk and jump / 追跡歩行+ジャンプ
FC/NES Daru-Do


Monsters in an ambush state (MOVE PATTERN 06) also temporarily shift to this state.
プレイヤーに向かって歩き、ランダムなタイミングでジャンプする。一定時間ごとに向きを補正し速度が変わる。ハシゴを使う。
待ち伏せ状態(行動パターン06)のモンスターも一時的にこの状態に移行する。
04: Chase flight / 追尾飛行
FC/NES Wizard


The slower it is, the better it tracks, and the faster it is, the worse it tracks.
プレイヤーに向かって直線状に飛行する。壁を通り抜ける。一定時間ごとに向きを補正する。プレイヤーと接触すると止まる。
遅いほど追尾が上手く、速いと下手。
05: Ceiling yo-yo / 天井ヨーヨー
FC/NES Rock Veest


When the player passes under it, it falls down and returns to the ceiling like a yo-yo.
天井を左右にまっすぐ歩く。壁にぶつかるか天井がなくなると反転する。ハシゴは無視する。
プレイヤーが真下を通ると落ちてきて、ヨーヨーのようにまた天井に戻る。
06: Ambush / 待ち伏せ
FC/NES Lion


その場を動かず待ち続ける。プレイヤーと接触すると追跡歩行+ジャンプ(行動パターン03)に移行し、時間経過でまた待ち伏せ状態に戻る。
NES
While not moving, it is invincible and is actually in a floating state.
動いていない間は無敵で、実は浮遊状態。
07: self-destruction flight / 自滅飛行
FC/NES Gers
ランダムな方向に直線状に飛行する。壁を通り抜ける。一定時間ごとに向きを変える。プレイヤーと接触すると自滅する。
08: Crown Boss bullets only / 四天王ボスの弾専用
4 Crown boss bullets are also treated as monsters.It disappears when it contacts the player with the same movement as the Chase flight state (MOVE PATTERN 04) and immediately resurfaces in the hands of the boss.
四天王ボスの弾もモンスター扱いである。
追尾飛行(行動パターン04)と同じ動きでプレイヤーに接触すると消滅し、即座にボスの手元に復活する。
SPEED / 速度
The same value is set in all versions.全機種で同じ値が設定されている。
2 byte. The value range is 0 to 16.
It is the speed of the monster. If this value is 0, the monster cannot move even if a MOVE PATTERN with an action is set.
2 byte。値の範囲は0から16。
モンスターの速度。この値が0だと動きのある行動パターンが設定されていても動けない。
For example, most mimics have an action pattern of 03 (move to player + jump) after contact with the player
and are internally it is trying to rampage but cannot move just opening and closing the lid on the spot due to its speed of 0.
例として、ほとんどのミミックはプレイヤーと接触後の行動パターンが03(プレイヤーに向かって移動+ジャンプ)になり、
内部的には暴れようとしているが速度が0のためその場で蓋をパカパカするだけで移動できない。
Only one of the Mimics, in the Xemn area, has its speed set to 08 and can move around.
ミミックのうちゼムン面の1体だけが、速度が08に設定されており動き回ることができる。
NES
Highest SPEED Ranking / SPEED 高い順ランキング
MSX1
Bullet of Archwinger: 16
アークウィンガーの弾: 16
4 Crown boss bullets are also treated as monsters.
四天王ボスの弾もモンスター扱いである。
NES
Gers: 15, 14, 12, 11
ゲルス: 15, 14, 12, 11
Gers in Pochi area.
Their speed is so fast that it is difficult to follow them with the humans eye.
ポチ面のゲルス。
その速さは人間の眼で追うのは難しいほど。
NES
Dedrudeathgadedo: 11, 10
デドルデスガデド: 11, 10
Dedrudeathgadedo in Lyll area.
リルル面のデドルデスガデド。
NES
Wlith: 10, 9
レイス: 10, 9
Wlith in Pochi area.
ポチ面のレイス。
NES
Bupurch: 9
ブープラッチ: 9
Bupurch in Maia area.
メイア面のブープラッチ。
NES
Meta Black: 9
メッタブラック: 9
Meta Black in common area.
共通面のメッタブラック。
NES
Cyclops: 8
サイクロプス: 8
Cyclops in the common area, Keela's room.
This is the monster that players will initially be puzzled by its speed.
In fact, the fastest monster flies almost 2x faster than this one.
共通面、ディルギオスの部屋にいるサイクロプス。
プレイヤーが最初にその速さに戸惑うであろうモンスター。
実は最速モンスターはこいつのほぼ2倍で飛ぶ。
Lowest SPEED Ranking / SPEED 低い順ランキング

NES
Elemental: 0
エレメンタル: 0
Internally it is trying to ramp up, but it does not move due to 0 SPEED.
内部的には暴れようとしているが、速度が0のため動かない。

NES
Mimic: 0
ミミック: 0
Internally it is trying to ramp up, but it does not move due to 0 SPEED.
内部的には暴れようとしているが、速度が0のため動かない。
NES
Mu: 0
ムウ: 0
Internally it is trying to jump up and ramp up, but it does not move due to 0 SPEED.
内部的には歩いたり暴れようとしているが、速度が0のため動かない。
There are many monsters with SPEED is 1. Therefore, the ranking is omitted.
SPEEDが1のモンスターは多数いるため割愛。
MONSTER DATA / モンスターデータ
Status Description of Monster Character and Data on 1944 monsters of all versions.Please see map page.
モンスターキャラクターのステータス解説と、全機種1944体のモンスターデータ。
Mapページに移動しました。
MONSTER DATA
マップの見方はこちら。
Relevant pages / 関連するページ
Status Description of Player Character.プレイヤーキャラクターのステータス解説。